


I love do-it-yourself projects, but I’m not what you’d call very ‘crafty.’ So when I discovered Washi Masking Tape I was hooked–and bought more rolls of it than I’d ever need. So here’s a fun wreath I made putting the Washi Tape to good use.
Porch Swings and Rocking Chairs
Where I’m from, we like to decorate our outdoor spaces more than our indoor space, probably because we spend a lot of time on our porches or outside in the evenings when the Southern heat still simmers, but is easier to enjoy.
That’s why I’m loving this project. It will go well with the trinkets and flowerpots I already have sitting around on my front porch–and is perfect for adding a little festive feel when I pull out the patriotic decorations for Memorial Day and the 4th of July.
DIY Wreath for All Occasions
Like most of my projects, everything else I used can be found at your local dollar store. I even spotted some patterned masking tape on my last visit–though obviously I didn’t buy it since I already have a year’s supply!
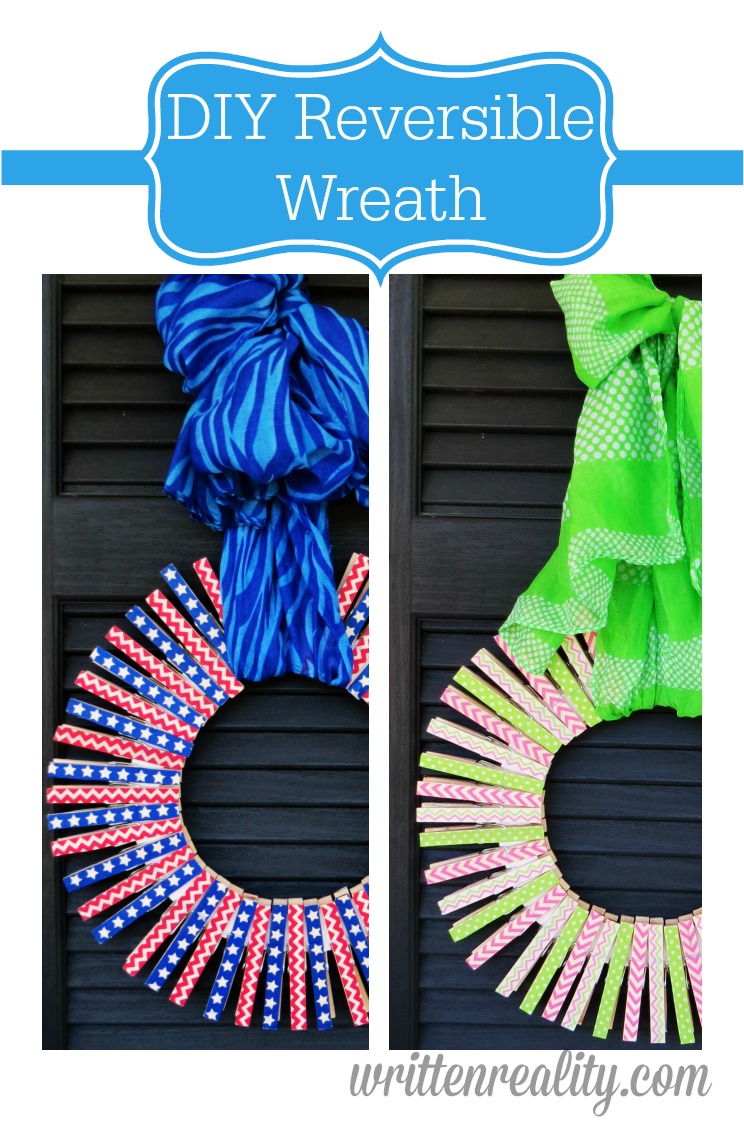
The great thing about this project, is that it’s REVERSIBLE. That way, you can easily tie another ribbon or scarf around it, flip it over, and you’ve pushed yourself into the next season or holiday.
Materials Needed for Your Own DIY Reversible Wreath
So here’s what you’ll need for this project:
- Clothespins
- Cardboard
- Felt, Cloth, or Posterboard (This is cosmetic to cover the cardboard ring. I used white poster board. But you could also cover the ring in a patterned cloth, felt, etc. Get as creative as you like!)
- Circle Pattern
- Ribbon or Scarf
- Washi Masking Tape
- Pencil
- Scissors
Endless Ideas for Every Season
Though the materials are basic supplies, the patterns you use and the scarf or ribbon you choose will be based on the holiday or season you want to celebrate.
Again, I wanted to keep it simple and inexpensive, so the scarves I used were found at the Dollar Tree. I then used the patterned Washi Tape to create an Easter/Spring Wreath that I could then flip over to take me into Memorial Day/Summer all the way to the 4th of July.
Ready to get started?
Hop on over to STEP ONE:
A double-sided wreath. What a great idea! I have not yet trusted myself to purchase Washi tape for fear of becoming obsessed with it.. You have temped me here . . .
ummm- well, I AM addicted to the Washi tape, Sheila, so just be warned!! 🙂
I saw these on Google + last night and just had to come over and leave a comment. These are so cute! I’m not the most crafty person but I feel confident I could make these. I also love shopping for washi tape- now I have something to do with it- thanks!
thanks for hopping over, Vanessa– I’m not crafty, either–so if I can do this project, anyone can!!
This is such a great idea. I have heard many great things about Washi Tape, but I fear if I mess with I will become hooked on using it and go into an even bigger poor house. This is definitely something that even kids can make for their Mothers as a gift too.
What a great idea! I’ve been wanting a simple washi tape project to try, and this may be it. Thanks!
This wreath really is incredibly adorable… and looks so easy! I’ll have to give it a whirl.
Jennifer @ The Jenny Evolution
That looks pretty creative! This is what we are all about. Use what you got to make the most of it. You rocked it! Glad to find you via SITS
Thanks, Deborah– I love SITS!!
OH MY GOD I love that it is reversible! Why? Why have I never thought of that? *picturing all the wreaths I have stacked up* Great post!
thanks, MJ! I’m not that crafty, but every now and again, I’ll have a creative idea, so I’m happy you liked it 🙂
HI Mitzi!
What a great idea!! I love this. We would love to feature this project on our site with credit and links back to you for the project. Let me know if we can and we would love to do that!
Thanks!
This is super cute! And I love washi tape (though I too have not yet taken the plunge since I’m sure I will become addicted as well)! 😉 Great idea!
Super cute wreath. Love that it’s reversible. Please come share at the Anything Goes linky, if you have not already.
love both sides 🙂 awesome idea! Stop by our Snickerdoodle Sunday when you have time and link up, we would love to have you visiting!
Mitzi, this is the BEST idea!!! I’m pinning of course! Thank you a bunch for sharing at Twirl and Take a Bow! ox
Hi! Just stopping by to let you know that your reversible wreath is so adorable! Great tutorial! Thanks for linking up with at the Wake Up Wednesday link party this week. Hope to see you again!
-Kate @ The Organized Dream (WUW co-host)
thanks, Kate! I enjoyed making this one 🙂
That is so cute! I love, love, love the reversible idea- it certainly saves storage space!
Love this idea! How genius to create 1 wreath with two sides?!? Thanks for linking up at Cook it! Craft it! Share it! This week!!
XO,
Katie
Awesome idea! simple and easy! pinned for our next wreath making….thanks
from the pinterest link up
What a cool idea! I’ve got a weak spot for clothes pins, and I particularly love the colors you choose. Thanks for linking up at The Creative Spark!
What a brilliant idea! I am pinning this to my wreath board on Pinterest!
I would be thrilled if you could share this post at my weekly Say G’day Saturday linky party. It has just started and this would be a brilliant addition.
Best wishes for a great weekend,
Natasha in Oz
thanks, Natasha! I will 🙂
Super cute idea, thanks for sharing on the Monday Funday link party!
Super cute! Pinned! Thanks for being part of our party. I hope you will swing by on Monday at 7 pm and party with us. We love having you! http://loulougirls.blogspot.com/
Happy Saturday! Lou Lou Girls
Hi Mitzi. Thanks for linking up at #Pintastic Pinteresting Party! This is really cute. Like so many of your other readers, I haven’t worked with the Washi Tape yet. (fearful of addiction,? maybe) I have so many other addictions, and lately so little time that I am still hesitant to go down that road. But I do enjoy seeing what others are creating. Thanks again for sharing.
I love it
Thanks for sharing i My Favorite Things Saturdays
Co-host
http://becreativemommy.blogspot.co.uk
Love the wreaths! Those are adorable! Thanks for sharing at My Favorite things Party Theresa @DearCreatives co-host.