


The easiest way to breathe new life into old furniture is by adding a fresh coat of paint. And applying a stenciled pattern is an inexpensive way to showcase your freshly painted furniture and your own personal style. That’s why I was thrilled when I received FolkArt Stencils & Paints to use for my latest project.
So today I’m sharing just how easy it is to paint with stencils by using a few simple and inexpensive supplies.
Thanks to Plaid Crafts and Blueprint Social for sponsoring this post. All opinions are my own.
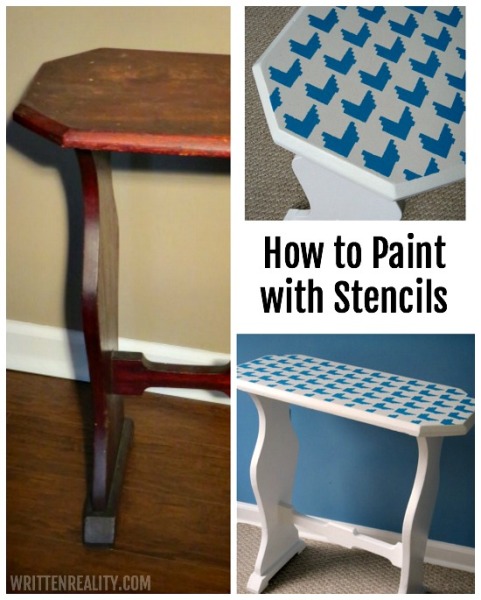
How to Paint with Stencils
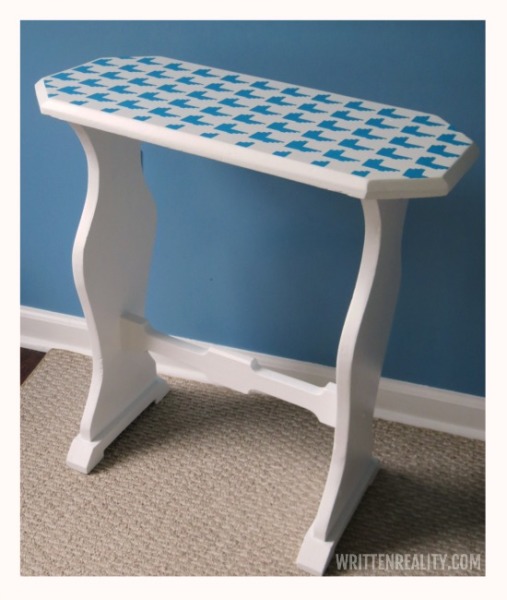
I found this side table at a yard sale several years ago for just a couple of bucks. Though I’ve used it ever since to hold a few items beside the sofa, the table looked rather sad and neglected.
It had obviously seen it’s better days, so I first gave it a nice fresh white coat for a brand new start.
After that, I used these items to brighten my sidekick for a little something extra:
FolkArt Stencils (mine is the Houndstooth pattern)
FolkArt Multisurface Paint (Cayman Blue)
Paint Sponge
You can find FolkArt Stencils, paint, and all that I used for this project at Michael’s, too.
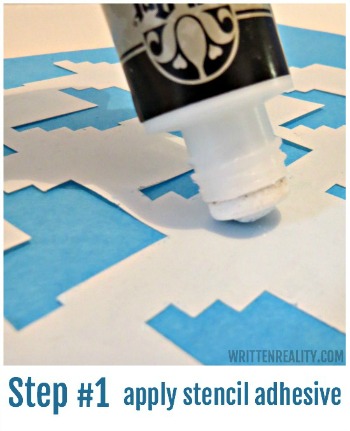
Step #1 Apply Stencil Adhesive
The FolkArt Stencil Adhesive makes everything easier. You simply roll it across the back of stencil, allow it to set a few minutes, then you’re ready to paint.
It gives it just a bit of sticky to keep the stencil in place without leaving behind any residue on your work. The adhesive lasts for quite some time. But if you have a large area to paint or need to keep moving your stencil, just rub a little more of the adhesive over it and you’re good to go.
Just make sure to pick up a bottle of the adhesive when you purchase your stencil. It really will save you time and make using the stencil so much easier.
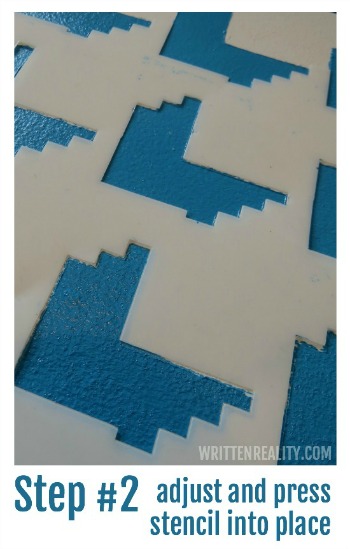
Step #2 Adjust and Paint
If you’re working on a wider area, you’ll need to decide where you want the pattern to start.
For me, my surface had a few angles, so I did take a little time beforehand making sure I could easily line up the pattern all the way to each edge.
With the adhesive on the back of the stencil, you then just press it gently into place. It won’t move until you peel it off and adjust it. Again, it easily peels on and off to make the process of reapplying easy, too.
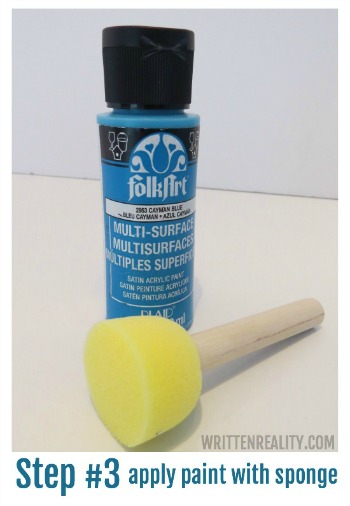
Step #3 Apply Paint with a Sponge
When using a stencil, it’s important to paint with a sponge. That way, you can reach those small spaces and saturate the stenciled area easily with your paint.
As you work, be sure to allow plenty of time to dry between coats, and especially as you work the stencil across the surface. Of course, the larger the surface area, the longer it will take to paint. The paint I used dried rather quickly, but just be patient between coats to allow it some time to dry.
For more FolkArt Stencils & Paint fun, check out these links on social media and follow from your favorite network, too:
The Plaid Palette Blog // Plaid on Pinterest // Plaid on Facebook // Plaid’s Instagram // Plaid on Twitter // Plaid on Google+ // Watch Plaid on YouTube //Sign Up for the Plaid Newsletter
Love the houndstooth pattern. Really brought the whole thing up to date. Love it. 🙂
thanks, Sarah– it helped brighten the space a bit, too
I had to pop over to see if you have a trick. I’ve never tried the stencil adhesive. I bet that makes a difference. Love the before/After Pinned for later.
This is such a great transformation. I love how easily it is to do this.